Thursday, April 24, 2008

Stellar Student Work: Still Life

By Alissa:

By Scott:

By Oscar:

Homework Due next week, May 1

Reminder:

You need to finish all shooting for your final book projects by next week MAY 1. Next week in class we will be uploading and ordering the books.

Our LAST CLASS is May 15...only 3 more weeks!!

To order books, go to:

iPhoto (on the computers at school)
Ofoto www.kodakgallery.com
blurb.com (download booksmart)

Fill Flash Demo Outside

Using Fill Flash
When shooting in a mixed light situation (ambient light + strobe), you will notice that the shutter speed is almost irrelevant. You will get almost the same reading whether the meter is set at 1/500 second or 1/60 second.The meter reads only the output of the strobe (which is approximately 1/3000 of a second). You will only start to see a difference in readings when when the shutter speed on the light meter is set to a much slower speed. At slower shutter speeds, the meter reads both the strobe and the ambient light.

Subjects are in shade, background is sunny. Camera is set to correctly expose background.

Fill flash is added so that Fstop reading meters same on subject as background

Fstop reading meters one stop brighter on subject than background


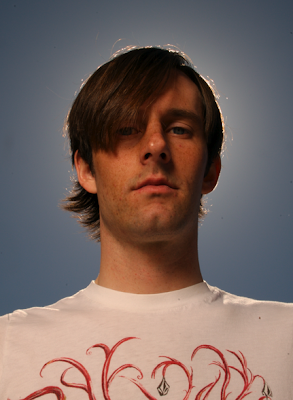
In the following 2 images, the sun is directly behind the subject's head to create a ring type hair light. The camera is set to properly expose the sky. Fill flash is added to fill in the face. In the top image, fill flash meters the same Fstop as the sky. In the 2nd image, the shutrter speed remains the same, but the flash is powered up so that it meters 1 stop brighter than the sky to make the subject "pop".


Fill Flash is also GREAT for outdoor group portraiture, especially at events like weddings. Set your camera to the meter reading you've taken on the background. Set the power output on the strobe to meter one Fstop brighter than the meter reading on the sky and shoot!


An Exercise to try on your own:

** Remember, the strobe doesn’t care what shutter speed you shoot at

The following is an exercise adapted from Photographic Lighting by Don Marr

Say you want to take a picture of your friend in a doorway. Your friend is slightly shaded, but the room behind your friend is brighter. You want a good exposure of both your friend and the room behind. The meter says you’d need to shoot the room at 1/15 second at F5.6 to get a correct exposure. If you were to take the picture at this setting, your friend would look dark, but the room would look correctly exposed. So you need to add fill flash. Remember, strobe doesn’t care what shutter speed you shoot at, the meter only reads the flash’s output (Fstop).

Indoors, the light meter will most likely get the same fstop reading from the strobe at 1/250 as it will at 1/30. That’s because at these shutter speeds, the meter is only reading the instantaneous pop of the strobe. You would need to turn the light to a much lower shutter speed to begin to see the influence from the ambient light of the room on your subject.

Set up your strobe so that the output meters F5.6. Start by shooting at 1/250 of a second, and then bracket shutter speeds down to 1/30 (keeping the camera at F5.6). Notice the subject remains relatively the same and the background gets brighter.

Wednesday, April 23, 2008

Grids!


A Grid is something that looks like a honeycomb or screen that is attached to your flash or strobe head. It diffuses the light and makes it weaker. Grids are used to control the light, limit spillage, direct light into a small area (like a snoot or spotlight), and create a greater rate of fall-off (decreases the light hitting the background).

Grids are essential accessories for any lighting system. A grid alters the shape and intensity of the light output from your softbox when it is mounted on a light head. Consider a grid as a painter would a brush, or a sculptor would a knife, or chisel.

Honeycomb grids and "egg crates" are rigid, or semi-rigid. Fabric grids are hand-stitched, and collapse easily for storage or transport. Use of a fabric grid, honeycomb grid, or "egg crate" will result in a narrower spread of light. The spread of light will be determined by the density of the honeycomb mesh, and the distance of the subject from the light.


Here are some online tutorials that I think are great.

DIY cardboard grids for your flash: click here


Examples:

No Grid on Flash:


Using a cardboard Grid on the flash (notice how it looks like a spot light):


Soft Lighting & Grids for Portraiture: click here

Sunday, April 13, 2008

Homework Due next Thursday 4/17

Everyone should please bring 10 images that they hope will fit into their final photo book project. More is fine, but at least 10. They can all be from the same shoot. All the shooting needs to be done for you final project in the next 3-4 weeks, so really get going on this! And have fun.

Thursday, April 10, 2008

Fieldtrip: AIPAD Photo Show


Today we went to AIPAD in NYC- an amazing photo expo with a vast array of both vintage and contemporary photography. In my opinion the $25 ticket is well worth it- nowhere else will you be able to see such a diverse collection of photography- basically the history of photography in one place.

Show Information

The AIPAD Photography Show New York will run from Thursday, April 10 through Sunday, April 13, 2008, at the Park Avenue Armory at 67th Street in New York City. Show hours will be:
Thursday, April 10 11:00 a.m. to 7:00 p.m.
Friday, April 11 11:00 a.m. to 8:00 p.m.
Saturday, April 12 11:00 a.m. to 8:00 p.m.
Sunday, April 13 11:00 a.m. to 6:00 p.m.

The admission is $25 daily and $35 for the run-of-show, and includes a show catalogue. No advance purchase is required. Tickets will be available at the door. For more information, the public can call AIPAD at 202.367.1158 or at newyork@aipad.com

---
AIPAD highlights, 2008:

Abe Morell at Bonni Benrubi
Two of Abelardo Morell’s photographs of Venetian rooms turned into camera obscuras. These look like slide projections but were made by covering the windows with black paper, leaving a pinhole which creates the view on the opposite wall. This always results in an upside down image unless corrected by an intervening lens.


Several original Ansel Adams prints


Sandy Skoglun's new piece


Skoglund's newest piece,Fresh Hybrid,(above) is an installation and photograph that explores the shifting boundaries between life and lifelike by fabricating an artificial landscape. Replacing blades of grass with pipecleaners and bark with wool fibers, the materials strive to transform nature into a cornucopia of human pleasure with ubiquitous soft and fluffy surfaces. As if on a spring day, the sculpted hybrid trees blossom with impossible bounty and cheer in the form of chenille chicks, mass-produced lucky charms that give us a fragile and unsettling glimpse into an imaginary lost innocence.

John Szarkowski(former photo curater of MoMA) at Pace/MacGill


Gustave Le Gray, original salt prints and paper negatives from the 1800's at Daniel Blau

(A paper negative is a negative created on photo-sensitive paper instead of a standard negative film.)

Wednesday, April 9, 2008

Intro to Still Life

A 4x5 view camera is one of the most commonly used formats in still life photography. In class we did a demo and took this polaroid of pair of sunglasses.


Remember when chooing your 4x5 lenses that the mm don't correspond to those on your 35mm lenses. Here is a conversion chart. We used a 210 lens, which is about the same as using a 60mm lens on your 35mm camera.


To practice a product/advertising shot, we also photographed some Chanel lipstick. Once using a plexi sweep lit from above and below, and once using natural light and reflector.


In this shot, we placed the lipstick on a plexi sweep and put a strobe below and a softbox above. Notice how there are no shadows around the bottom edges of the lipstick case. A long lens (over 100mm) was used at F11. Notice that everything in the frame is in focus because of this.


In this shot we placed the lipstick on a sheet of white paper, right next to a big window. The window lit the subject from the side and a reflector filled in the shadows. A macro lens was used at F4, creating just a small plane to be in focus, highlighting the "chanel" stamp on the lipstick. Notice that small shadows have been cast to the side of the tube, because it sits on paper and is not lit from below like the above image.